Content:
Embarking on the journey of learning how to make a fishing rod and master the art of fly fishing can be an exhilarating experience. Whether you are a beginner or looking to refine your skills, understanding the basics and following a structured approach can make all the difference. In this comprehensive guide, we will walk you through the process of making your own fishing rod and provide you with essential fly fishing techniques, complete with detailed illustrations.
Step 1: Gathering Materials

Before you start, you will need to gather the necessary materials. Here's a list of items you'll need:
- Graphite or fiberglass rod blank
- Rod guides (also known as eyes)
- Reel seat
- Rod tip top
- Rod handle
- Thread and needle
- Sandpaper
- Epoxy or super glue
- Rod building guide or plan
Step 2: Preparing the Rod Blank
- Selecting the Blank: Choose a rod blank that suits your desired action and length. Graphite blanks are lightweight and durable, making them popular among anglers.
- Cleaning the Blank: Thoroughly clean the rod blank to remove any dust or debris. This will ensure a smooth and even application of the finish.
- Cutting the Guides: Measure and mark the spots where the rod guides will be attached. Use a sharp knife or a guide cutter to make precise cuts.
- Attaching the Guides: Slide the guides onto the rod blank, ensuring they are aligned properly. You may need to use a heat gun to expand the guides slightly if they are too tight.
Step 3: Building the Rod
- Attaching the Reel Seat: Apply a small amount of epoxy or super glue to the reel seat and press it onto the rod blank. Secure it with a clamp and let it cure according to the manufacturer's instructions.
- Adding the Rod Tip Top: Once the reel seat has cured, attach the rod tip top using the same method. Be sure to align it properly with the guides.
- Securing the Rod Handle: Measure and cut the rod handle to the desired length. Attach it to the rod blank using thread and a needle, creating a strong and durable knot.
- Applying the Finish: Sand the rod blank to a smooth finish, then apply the desired finish or varnish. Allow it to dry completely before moving on to the next step.
Step 4: Learning Fly Fishing Techniques
- Choosing the Right Fly: The type of fly you choose depends on the fish you're targeting and the conditions of the water. Research the species you're interested in and select flies that mimic their natural prey.
- Setting Up Your Equipment: Attach the fly to your leader using a loop-to-loop connection. Make sure your line is taut and your fly is properly weighted.
- Cast Your Line: Learn the basic casting techniques, such as the overhead cast and the roll cast. Practice these casts to develop a smooth and accurate delivery.
- Presenting the Fly: Once you've made a cast, let your fly drift naturally through the water. Adjust your line and leader to ensure the fly is presented at the correct depth and speed.
- Reading the Water: Observe the water and look for signs of fish activity. Pay attention to surface disturbances, bubbles, and other indicators that fish are present.
- Hooking the Fish: When a fish strikes, set the hook quickly and firmly. Use a steady hand and maintain pressure on the line to guide the fish to the surface.
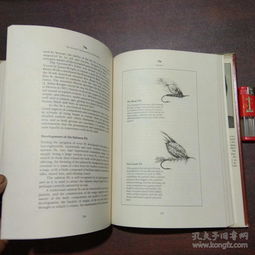
Illustrations
To help you visualize the steps and techniques, we have included detailed illustrations throughout this guide. These illustrations will guide you through the process of making your fishing rod and mastering the art of fly fishing.
Conclusion
Learning how to make a fishing rod and mastering the art of fly fishing requires patience, practice, and a willingness to learn. By following this step-by-step guide and utilizing the provided illustrations, you'll be well on your way to becoming a skilled fly fisherman. Remember, the key to success is to enjoy the process and continue honing your skills. Happy fishing!