Fishing, an ancient pastime that has stood the test of time, requires a blend of patience, skill, and knowledge. One of the most crucial aspects of successful fishing is mastering the art of tackle adjustment, particularly in the delicate process of tuning your fishing float or bobber. This article delves into the essential techniques and provides a step-by-step guide with diagrams to help you become a pro at adjusting your fishing float.
Understanding the Importance of Tackle Adjustment
Before we dive into the nitty-gritty of adjusting your fishing float, it's important to understand why this process is so vital. The float, also known as a bobber, is a device that allows you to detect when a fish has taken the bait. The right adjustment ensures that your float can accurately indicate when a fish is biting, thus increasing your chances of a successful catch.
Step 1: Choosing the Right Float
The first step in the process is selecting the right float for your fishing conditions. Different floats are designed for different types of fishing, such as still water or fast-flowing rivers. The weight and buoyancy of the float should match the type of fish you're targeting and the conditions of the water.
Step 2: Attaching the Float
Once you've chosen the appropriate float, it's time to attach it to your line. Here's a basic guide on how to do it:
- Thread the Line Through the Float: Start by threading your fishing line through the hole at the top of the float.
- Secure the Line: Use a small piece of rubber or a split ring to secure the line to the float. This prevents the line from slipping out.
- Adjust the Length: Make sure the float is at the desired height above the hook. This is typically a few inches above the hook, but it can vary depending on the fish species and water conditions.
Step 3: Learning the Basics of Tackle Adjustment
Now that your float is attached, it's time to learn the basics of tackle adjustment. Here are some key points to remember:
- Buoyancy: The float should be buoyant enough to keep the bait at the desired depth, but not so buoyant that it is easily moved by wind or currents.
- Sensitivity: The float should be sensitive enough to detect even the lightest taps from a fish, but not so sensitive that it moves excessively in normal water currents.
Step 4: The Tackle Adjustment Process
Here's a detailed step-by-step process to adjust your fishing float:

- Start with a Basic Setup: Begin with your float at a standard height above the hook. This gives you a baseline to work from.
- Adjust for Depth: If you're fishing in deep water, you may need to add more weight to your line to ensure the bait stays at the desired depth. This can be done by adding split shot or other sinkers.
- Fine-Tune Sensitivity: To make your float more sensitive, you can move the weight closer to the hook. This allows the float to move more freely and detect lighter bites.
- Test Your Setup: Cast your line out and observe how the float behaves. It should move only slightly with normal water currents but react quickly to any disturbances, such as a fish biting.
Step 5: Diagrams for Tackle Adjustment
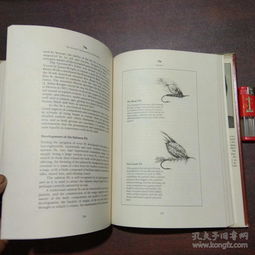
To help you visualize the process, here are some diagrams that illustrate the key steps in adjusting your fishing float:
Diagram 1: Basic Float Attachment
- Line through float hole
- Secure line with rubber or split ring
- Adjust float height above hook
Diagram 2: Adding Weight for Depth
- Attach weight (split shot) to line
- Place weight above float
- Adjust float height as needed
Diagram 3: Fine-Tuning Sensitivity
- Move weight closer to hook
- Allow float to move more freely
- Observe float response to water currents and disturbances
Conclusion
Adjusting your fishing float is a skill that takes practice and patience, but it is well worth the effort. By understanding the basics of tackle adjustment and using the diagrams provided, you'll be well on your way to becoming a more successful angler. Remember, the key to a great fishing trip is not just the equipment, but also the knowledge to use it effectively. Happy fishing!


