Content:
Introduction: Fishing is an ancient pastime that has been enjoyed by people around the world for centuries. One of the fundamental skills every angler must master is the art of tying a single hook to a fishing rod. This seemingly simple task can make or break your fishing experience, as a well-tied hook can lead to successful catches, while a poorly tied one can result in lost fish and frustration. In this article, we will delve into the steps and techniques for how to bind a single hook to your fishing rod effectively, ensuring you are ready to cast out and reel in the big ones.
Section 1: Understanding the Basics Before diving into the specifics of how to tie a single hook, it is essential to understand the different types of hooks available and their uses. Hooks come in various sizes, shapes, and styles, each designed to catch specific types of fish. Common hook types include:
- Jig hooks: Ideal for jigging techniques.
- Worm hooks: Perfect for rigging worms or soft plastics.
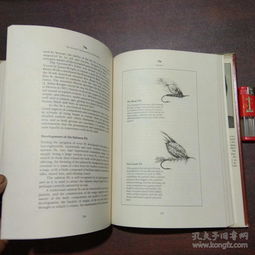
- Fly hooks: Used in fly fishing for catching fish with a fly rod.
- Circle hooks: Designed to be less damaging to fish.
Section 2: Choosing the Right Fishing Line The type of fishing line you choose can greatly affect your fishing success. The most common types of fishing line are:
- Monofilament: The cheapest and most flexible, but susceptible to stretching and breaking.
- Fluorocarbon: More expensive but offers better visibility in clear water and less stretch than monofilament.
- Braided line: Strong and thin, providing a high level of sensitivity but with less stretch than monofilament or fluorocarbon.
Once you have selected the appropriate hook and line, you are ready to proceed with the tying process.
Section 3: The Basic Single Hook Tying Technique Here is a step-by-step guide to tying a single hook to your fishing rod:

- Cut the Line: Start by cutting a length of fishing line that is about twice the length of your rod.
- Make a Loop: Hold the line between your thumb and forefinger, leaving a loop at the end.
- Pass the Loop Through the Hook: Pass the loop through the eye of the hook, ensuring the tag end is on the opposite side of the hook.
- Make a Knot: Form a simple overhand knot with the tag end of the line, leaving a tag end about 3-4 inches long.
- Secure the Knot: Pull the tag end tight to form a secure knot, then trim any excess line.
- Attach the Hook: Place the hook through the loop, ensuring it is aligned properly with the line.
- Finish the Knot: Tighten the knot further by pulling on the main line, then secure it by looping the tag end back through the knot.
- Trim the Tag End: Finally, trim the tag end close to the knot to prevent it from unraveling.
Section 4: Advanced Tying Techniques Once you have mastered the basic single hook tying technique, you can explore more advanced methods for different fishing scenarios. Here are a few examples:
- Improved Clinch Knot: Ideal for heavier fishing lines and more durable than the basic overhand knot.
- Grasshopper Knot: A strong and simple knot that works well with braided lines.
- Palomar Knot: Known for its strength and ease of use, especially with very thin lines.
Section 5: Fishing Techniques with a Single Hook Now that you have your hook tied, it's time to learn how to use it effectively. Here are some fishing techniques to consider:
- Jigging: Use a jig hook to mimic the movement of a baitfish, often with a heavy jighead.
- Rigging: Attach a worm or soft plastic to a worm hook and let it sit on the bottom or twitch it gently.
- Fly Fishing: Use a fly hook to cast a fly, imitating insects or other food sources for fish.
Conclusion: Tying a single hook to your fishing rod is a fundamental skill that every angler should possess. By understanding the basics, choosing the right equipment, and mastering the tying techniques, you will be well on your way to enjoying a successful fishing trip. Remember that practice makes perfect, so don't be afraid to experiment with different knots and techniques to find what works best for you and the fish you're targeting. Happy fishing!