Content:
Introduction: Fly fishing, an ancient and revered pastime, requires not only a keen eye and a patient spirit but also a thorough understanding of the technical aspects of the sport. One such critical element is the proper tying of your leader and tippet. This article will delve into the art of fly fishing and provide you with step-by-step instructions on how to tie a perfect leader and tippet, ensuring that your fly is presented to the fish in the most natural and effective manner.
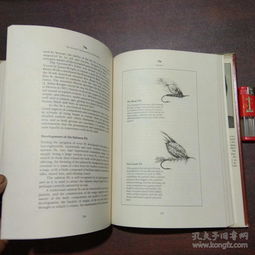
Understanding the Leader and Tippet: Before we dive into the tying process, it's important to understand the roles of the leader and tippet in fly fishing. The leader is the portion of the line that connects the fly line to the fly, and it is designed to be a natural extension of the fly itself. The tippet, on the other hand, is the end of the leader that terminates in the fly and is typically made from a softer, more flexible material to minimize the impact of the fly on the water.
Materials Needed:
- Fly line
- Leader material (typically monofilament or fluorocarbon)
- Tippet material (also monofilament or fluorocarbon)
- Leader/tippet spool or bobbin
- Leader/tippet needle
- Nippers
- Knot tying tools (optional, but highly recommended for precision)
Step-by-Step Guide to Tying a Leader and Tippet:
Measuring and Cutting the Leader Material: Start by measuring the desired length of your leader (typically between 9 to 12 feet for trout fishing). Use the leader/tippet spool or bobbin to hold the material in place and make a clean cut with your nippers.
Measuring and Cutting the Tippet Material: Next, cut the tippet material to the desired length, which is usually about a foot longer than the fly's size. This extra length will allow you to create a loop for the fly.
Attaching the Tippet to the Leader: Begin by threading the leader through the eye of the fly. Then, take the tippet material and thread it through the same eye, ensuring that the ends of the tippet and leader are aligned.
The Improved Clinch Knot: Now, it's time to tie the Improved Clinch Knot, which is one of the most reliable knots for attaching a fly to the leader. Here's how to do it:
a. Wrap the tag end of the tippet around the standing part of the leader five times.
b. Pass the tag end back through the loop formed by the wraps.
c. Make another wrap around the tag end, then pull the tag end through the loop.
d. Moisten the knot with water and tighten it. Make sure the knot is snug but not overly tight, as this can damage the line.
The Loop Knot: To create a loop at the end of the tippet for the fly, use the Loop Knot (also known as the Blood Knot). This knot allows for easy changing of flies and provides a natural presentation:
a. Create a loop in the tippet material by passing the tag end through the eye of the fly and then back through the loop.
b. Moisten the knot and pull it tight, making sure the loop is large enough to fit the fly's eye.

c. Trim the tag end to about 1/4 inch from the knot.
Final Adjustments: Once the knot is securely tied, check the knot's strength by pulling on the tag end. It should feel firm but not too tight. Trim any excess line and make sure the knot is positioned properly on the leader.
Conclusion: Tying a perfect leader and tippet is a fundamental skill in fly fishing that can significantly impact your success on the water. By following these step-by-step instructions, you'll be well on your way to mastering this art. Remember, practice makes perfect, so don't be afraid to tie multiple leaders and tippets to hone your technique. Happy fishing!