Content:
Introduction: Fishing line beads are a popular accessory in the world of fishing, adding both visual appeal and practicality to lures and hooks. However, the process of knotting fishing line beads can sometimes be daunting for beginners. In this article, we will delve into the essential techniques for knotting fishing line beads, providing you with step-by-step instructions to ensure a secure and durable connection.
Section 1: Understanding the Basics Before we dive into the knotting techniques, it's important to understand the basics of fishing line beads. These beads are typically made of materials such as plastic, glass, or metal and come in various sizes, shapes, and colors. They are commonly used to weight lures, create patterns, or simply add an aesthetic touch to your fishing gear.
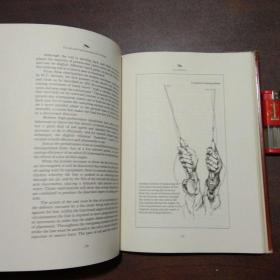
Section 2: The Overhand Knot The overhand knot is one of the simplest and most versatile knots for securing fishing line beads. Here's how to tie it:
- Start by holding the end of your fishing line in one hand and the line attached to your lure or hook in the other.
- Cross the working end of the line over the standing end, forming a loop.
- Pass the working end through the loop you've just created.
- Pull both ends of the line to tighten the knot.
- Once tight, trim any excess line.
Section 3: The Clinch Knot The clinch knot is another popular choice for securing fishing line beads due to its strength and simplicity. Here's how to tie it:
- Start by making a simple overhand knot with the end of your fishing line.
- Pass the working end of the line through the loop of the overhand knot, creating a second loop.
- Hold the second loop in place with your fingers.
- Make a second overhand knot with the working end, passing it through the second loop.
- Tighten the knot by pulling both ends of the line, ensuring the second loop is snug against the first.
- Trim any excess line.
Section 4: The Surgeon's Knot The surgeon's knot is a more complex knot that provides exceptional strength and is often used for larger fishing line beads. Here's how to tie it:
- Make a simple overhand knot with the end of your fishing line.
- Cross the working end over the standing end and pass it through the loop of the first overhand knot.
- Repeat this process, passing the working end through the loop you've just created.
- Make sure you have made four turns in total.
- Pass the working end through the large loop you've formed at the top of the knot.
- Tighten the knot by pulling both ends of the line, ensuring the loops are snug against each other.
- Trim any excess line.
Section 5: The Blood Knot The blood knot is a favorite among fly fishermen due to its strength and ability to join two lines of different diameters. Here's how to tie it:
- Lay the two lines parallel to each other and make a loop in one line, passing the other line through the loop.
- Make a second loop in the same line, passing the first line through the loop.
- Repeat the process on the second line, making a loop and passing the first line through it.
- Cross the two loops over each other, ensuring they are parallel.
- Make another loop in each line and pass the opposite line through the loop.
- Tighten the knot by pulling both ends of the line, ensuring the loops are snug against each other.
- Trim any excess line.
Conclusion: Mastering the art of knotting fishing line beads is an essential skill for any angler. By understanding the basics and practicing these essential techniques, you can ensure a secure and durable connection that will enhance your fishing experience. Whether you're using the overhand knot, the clinch knot, the surgeon's knot, or the blood knot, each method has its unique advantages and can be adapted to suit your specific needs. Happy fishing!