"Mastering the Art of Fly Fishing: A Step-by-Step Guide to Tying Fly Line with Illustrations"
Article Content:
Introduction: Fly fishing is an art form that combines patience, skill, and a deep connection with nature. One of the fundamental skills every fly fisherman must master is the proper tying of the fly line. A well-tied line ensures that your flies can be cast accurately and that your connection with the fish remains seamless. In this article, we will delve into the intricacies of how to bind a fly line, complete with a detailed, illustrated guide.
Understanding Fly Line Components: Before we dive into the tying process, it's essential to understand the components of a fly line. Typically, a fly line consists of the following parts:
- Leader: The tippet that connects the fly line to the fly. It is usually made of monofilament or fluorocarbon.
- Taper: The part of the line that transitions from the thick backing to the thin fly line.
- Running Line: The main body of the line that is cast and retrieves the fly.
- Head: The forward part of the running line that is usually tapered to help the fly land softly.
Choosing the Right Fly Line: Before you start tying, you need to choose the right fly line for your specific fishing conditions. Factors to consider include:
- Type of Fish: Different fish species may require different line types and densities.
- Water Conditions: Clear water may necessitate a lighter line, while murky water might call for a heavier line.
- Fly Size: The size of the fly you're using will also influence the line choice.
Step-by-Step Guide to Tying Fly Line:
Step 1: Prepare Your Materials
- Gather your fly line, backing, leader, and tippet.
- Ensure you have a sharp pair of scissors, a line tying tool, and a water source for wetting the line.
Step 2: Attach the Backing to the Line
- Cut a length of backing material and tie it to the end of your fly line using an improved clinch knot.
- Make sure the knot is snug but not too tight, as this could damage the line.
Step 3: Attach the Taper to the Backing
- Cut a length of taper material and tie it to the end of the backing using an improved clinch knot.
- The taper should be long enough to create a smooth transition from the backing to the running line.
Step 4: Attach the Running Line to the Taper
- Cut a length of running line and tie it to the end of the taper using an improved clinch knot.
- The running line should be long enough to reach the end of the fly line head.
Step 5: Attach the Head to the Running Line
- Cut a length of head material and tie it to the end of the running line using an improved clinch knot.
- The head should be tapered to help the fly land softly on the water.
Step 6: Add the Leader and Tippet
- Cut a length of leader material and tie it to the end of the head using an improved clinch knot.
- Attach the tippet to the end of the leader using the same knot.
Step 7: Trim and Adjust
- Trim any excess material from the knots and ensure all knots are secure.
- Adjust the length of the leader and tippet to your desired lengths.
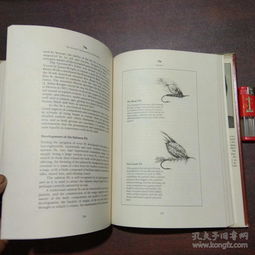
Illustrated Guide:
[Here, you would include a series of detailed illustrations showing each step of the fly line tying process. Each illustration should be accompanied by a brief description of the action being taken.]
Conclusion: Tying a fly line may seem daunting at first, but with practice and the right guide, it becomes a straightforward and rewarding process. A well-tied fly line is the foundation of a successful fly fishing experience. By following this step-by-step guide, you'll be well on your way to mastering the art of fly line tying and enhancing your fishing adventures. Happy fishing!